Features
Plans
Get Windscribe
How to change your Internal DNS in the Windscribe App
guides

We have recently updated a feature that allows users to take advantage of a selection of third party DNS services while connected to the Windscribe VPN.

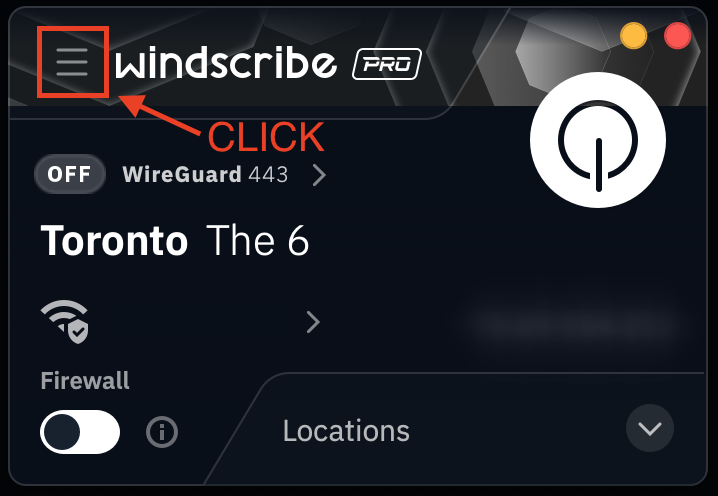
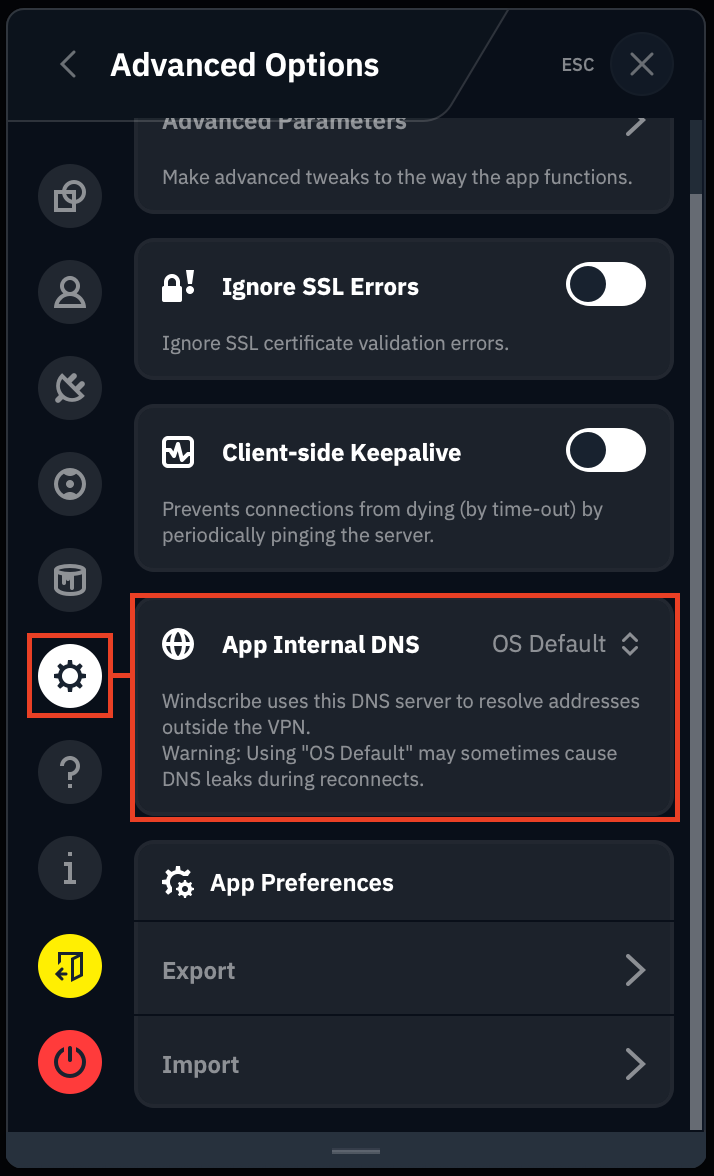
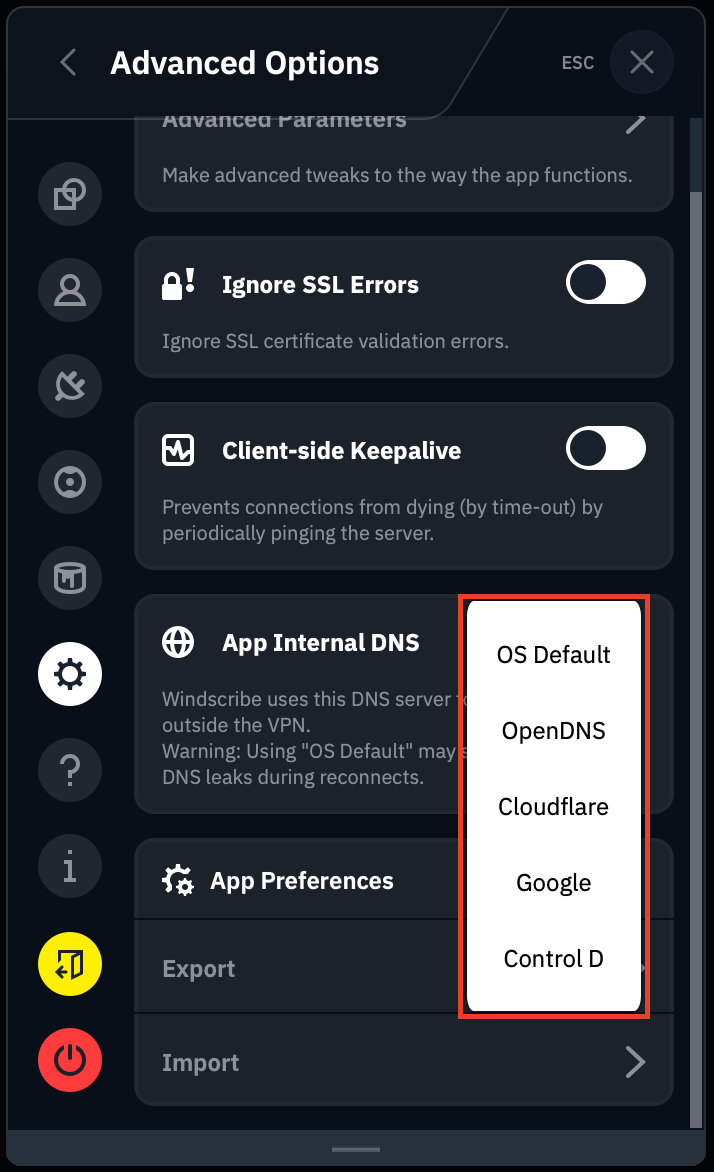
After installing the latest version of the Windscribe desktop app, here's how you can change the internal DNS:
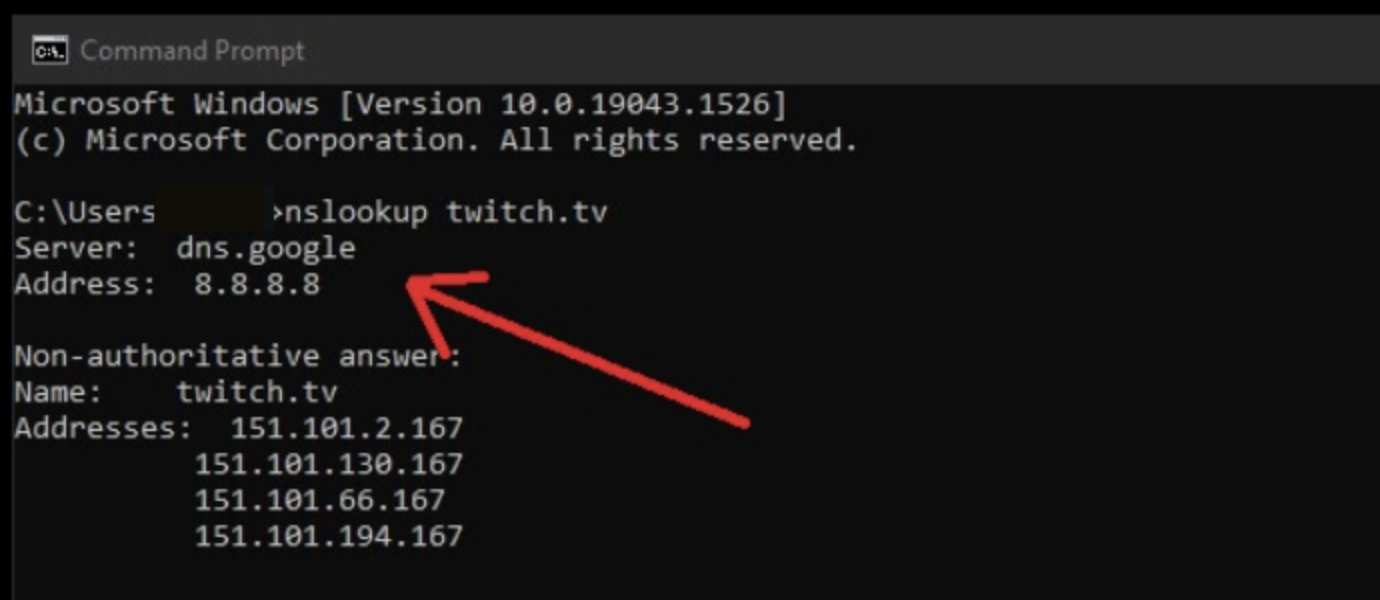
  • Ensure that the desktop client is disconnected and that the firewall has been disabled. This is important
  • Click the Preferences tab (top left next to the Windscribe logo)

    Preferences Tab location
  • Next, select Advanced Options (cog/gear icon)
  • Scroll down and look for the App Internal DNS option

    Screenshot 2024 06 06 at 6.29.26 Pm

  • From the drop down list, select the DNS service you'd like to use

    DNS options

  • Return to the main screen of the desktop client and connect to a location
  • After you have connected, open Command Prompt (Windows) or Terminal (Linux or MacOS) and run an NSlookup test against any domain. A screen shot has been pasted below:

    B328ccc99bbe9a5e88d1099dacca79df

After running the NSlookup test, you should get a DNS result for the third party DNS. 

NOTE: Keep in mind that when using the custom DNS, your R.O.B.E.R.T. settings will not be applied as R.O.B.E.R.T. is Windscribe's DNS. If you want to use R.O.B.E.R.T., just select it from the settings above again and reconnect to the VPN.

COMMUNITY
Talk to Garry
Feeling lost or lonely? Talk to Garry.
r/Windscribe
Find solutions, discuss ideas and share your feelings on our subreddit.
Get in touch
Windscribe
Company
forground_icon© 2024 Windscribe Limited